TrackiPet 4G guide

General information
These operating instructions are for the TrackiPet 4G tracker, which will simply be referred to as ‘tracker’ in the following. They contain important information regarding set-up and operation. Before using the tracker, please read the operating instructions carefully. This particularly applies to the safety notes. Failure to adhere to these operating instructions may result in severe injury or damage to the tracker.
The operating instructions are based on the standards and rules in force in the European Union. When abroad, you must also observe country-specific guidelines and laws. Keep the operating instructions for future use. If you pass the tracker on to third parties, please be absolutely sure, to include these operating instructions.
Getting started
Charge your device
The device needs to be charged for at least 2hrs before the first use.

Turn on the device and start tracking
In order to check if the device is on, please press shortly on the button – green light should appear. If not – make a 5s long press on the button to switch the device on (to switch off – make a 3S long press on the button).
Initial set-up
Installing and charging the battery
When you unpack the tracker for the first time, the battery is empty. Charge it as follows:
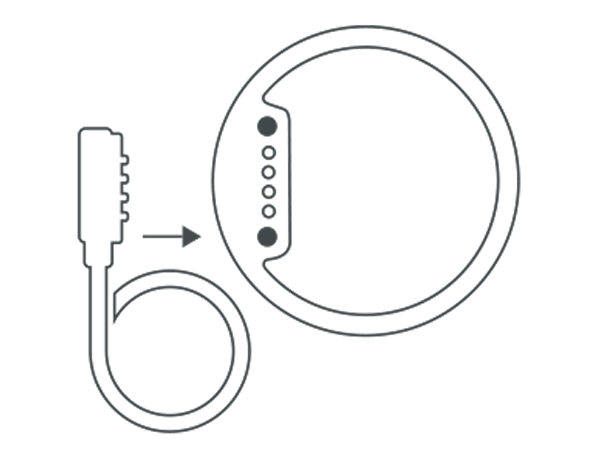
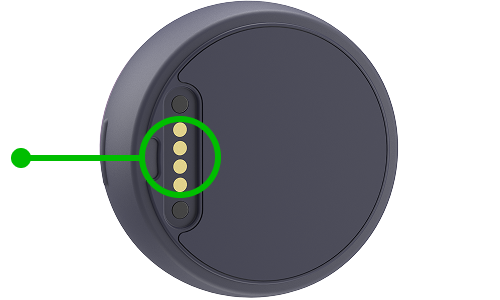
- Connect the charging plug of the charging cable to the tracker with the Micro USB.
- Connect the other end of the charging cable to the USB power adaptor and then to the power socket.
- Alternatively you can also connect the charging cable to a computer.
- Charge the tracker for 2 hours.
- The red light will blink whilst charging. When the tracker is fully charged, the light will turn solid red.
- Disconnect the tracker from the charging cable.
Turning the tracker on
- Take the tracker outside so that it is in the open air.
- Verify tracker is ON by pressing and hold the ON/OFF button. Red light will blink.
- Place the tracker down and leave it for at least 15 minutes. This allows the tracker to perform its initial GPS positioning, which is required for the device to function correctly.
Once completed, the tracker will be ready for use and can be activated.
Please note: this procedure is only required the very first time the tracker is turned on.
Activating the tracker via Web
- Open your internet browser and go to trackipet.com
- Register and create your TrackiPet account, then wait for the activation email from TrackiPet, click on the confirmation link, then login.
- Click on “Add Tracker” and follow the on-screen instructions.
- Insert your tracker IMEI and Device ID, and follow the instructions to activate your service plan.
Activating the tracker via App
- Download the TrackiPet app from the Apple Store or Google Play.
- Register or log into your TrackiPet account.
- Tap on “+” icon to add the device and follow the activation instructions.
Notification
Low battery
When the battery percentage drops to 10%, an alert will be triggered using all the chosen communication methods. The user’s specified phone number or email will receive the location details along with a text message.
Zone entry / Zone exit
A geofence is a virtual boundary that can be customized by the user. Whenever the tracker crosses the boundary, whether exiting or entering the defined area, the user will receive a notification within the app. Additionally, the user’s specified phone number or email will receive the location information along with a text message.
Please take note that there is a cooldown period of 5 minutes between two consecutive alerts.
SOS key pressed
When the user holds down the SOS button for a minimum of 2 seconds, both the location information and a text message will be sent to the phone number or email address that they have previously provided.
Power ON / OFF
When the device is fully charged and powered on, a notification will be triggered to inform the user about the device being turned on. Similarly, when the device is shut down, a message will be sent to the user to notify them of the shutdown.
Buttons
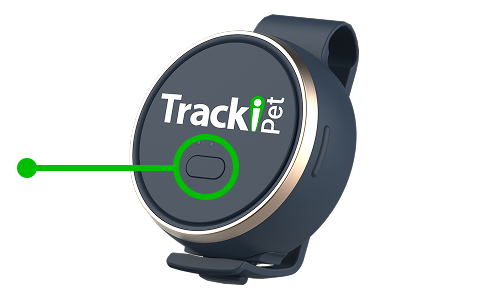
ON / OFF button
Press and hold the power button for 5s to turn the device On.
Press and hold the power button for 7s to turn the device On.
Please note: To check if your device is ON or OFF, quick press the front button. If you see lights it is on, if you don’t it is OFF.
SOS button
Short triple press on the main button.
Charge device
Plug charging cable to the magnetic socket in the back of the device, charging can take up to 2 hours (till the green led gets solid).
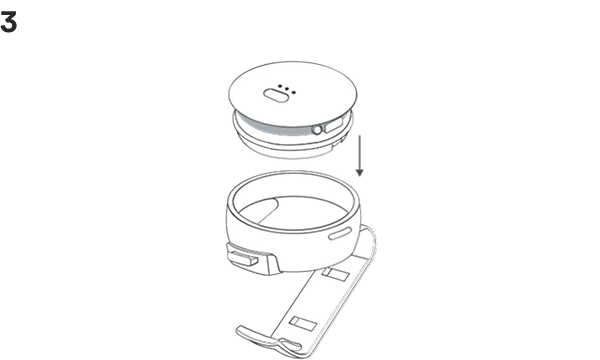
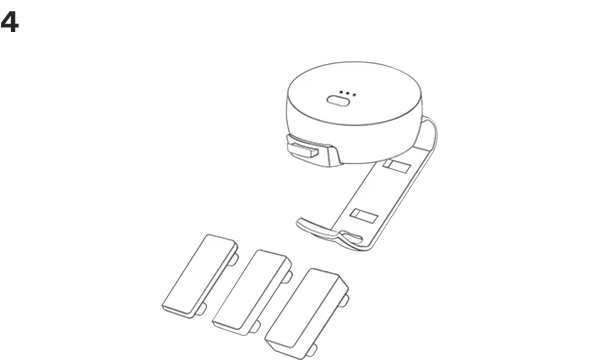
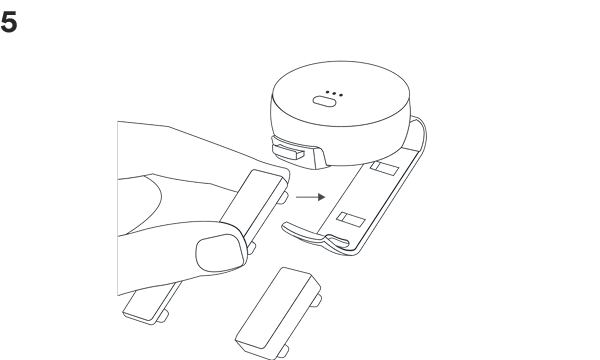
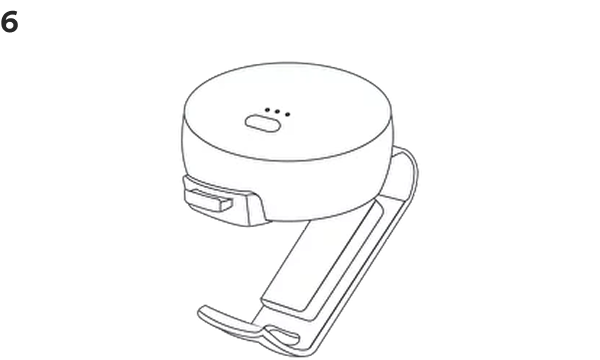
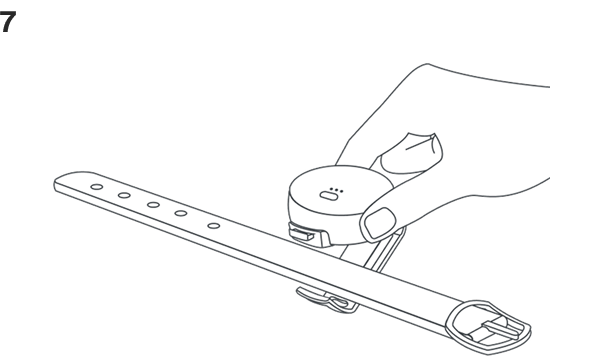
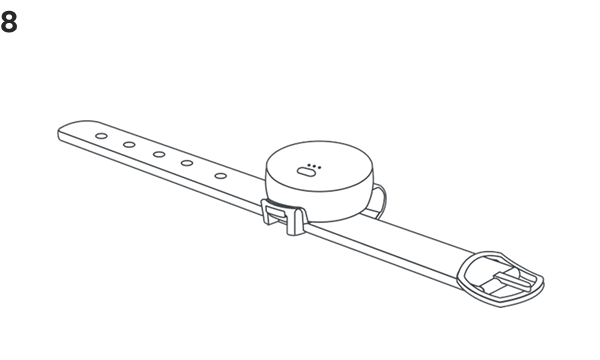
Clips

Lights
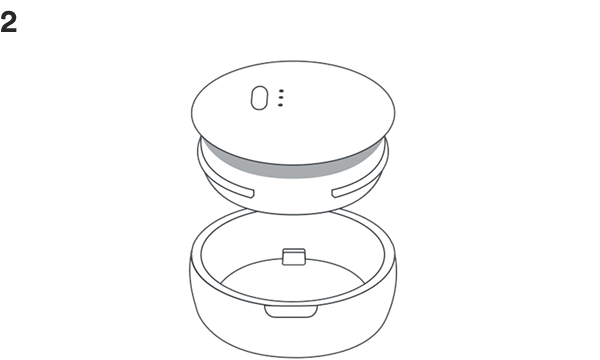
Device is starting up
Long press on power button
Device is powering off
Press the power button for 3s
Device is online
Single press on power button
Device is on but offline
Single press on power button
Activate SOS mode
Long press
Low battery
Flashes continuosly
Battery is charging
Connect to power

